After an interesting experiment with the 3TC, and much discussion.... another motor needed to be chosen. The next on the list for a small, late model, toyota NA motor was the 3S-GE. A Generation 2 motor out of a Corona was chosen, and all the necessary bits were sourced. What follows are details of the conversion, thanks to Mark, Matt, Tim, Lance & Reo from Garage Dori team, Brendan from Niteparts, Stu, and Aiden from Drive Inn, Carl & Dan from Appco, Scott & Neil at Fraser Cars
Last update: 18/01/2005
Sourcing Parts:With all motors that we fit, I like to fit new seals were possible. So new cam seals and rear main were fitted. The
motor was then given a good wash with kero.
The old 3T was pulled out, and then the 3S lowered in place with a crane. It was not going to sit in there nicely,
but too far forward. So, the firewall had to be given a beat with a 10lb sledge. It was knocked back about 2-3
inches to clear the standard distributor cap and water outlets.
With the engine able to hang in a suitable spot, it was yanked out and the clutch & flywheel fitted. Then, the
gearbox was bolted on and the motor was lowered back into the bay.
The gearbox mount bolted onto the front 4 bolts, as per the 4AGE install. The 3T and box bolted to the rear 4 bolts,
as per 3A Auto I believe.
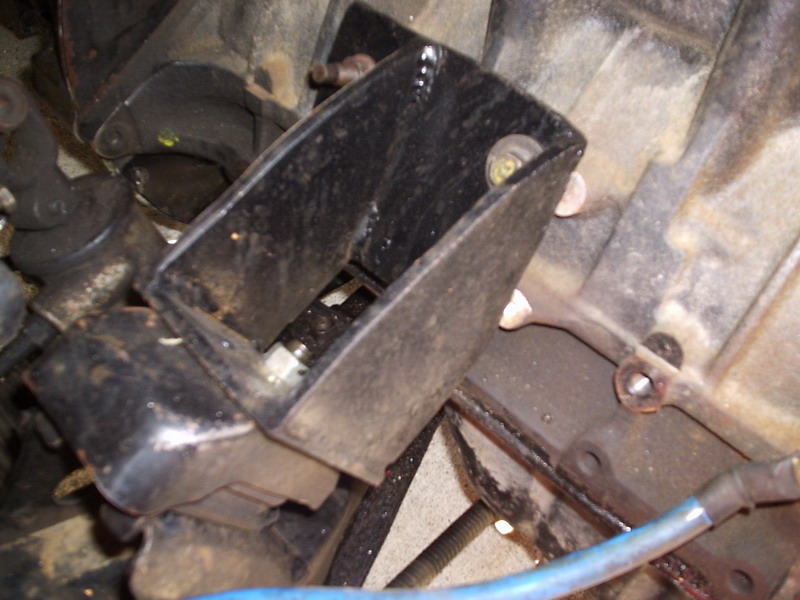
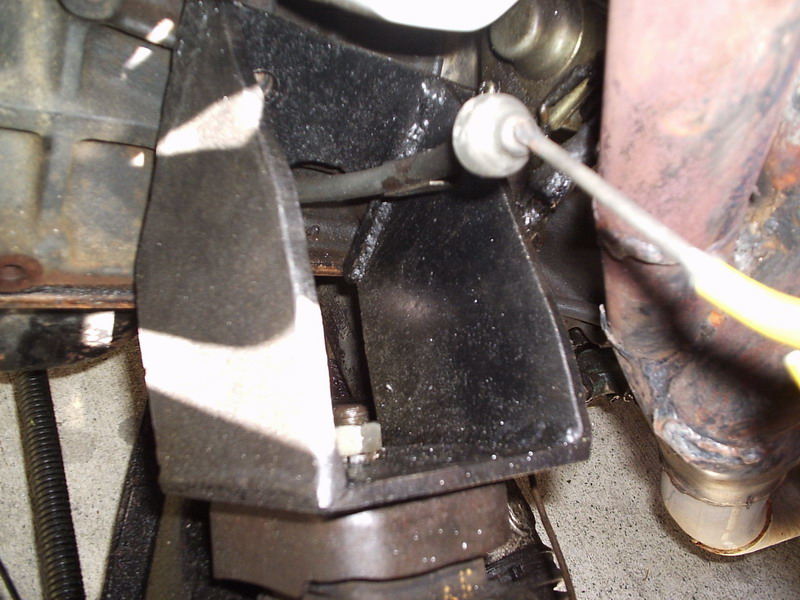
Brendan lined up the motor and propped it up so it was stable, then helped with making cardboard cutouts of the new
mounts. With the cutouts marked up on some steel Lance gas-axed them out, and then I cleaned them up.
Test fitting the cutouts on the motor required them to be drilled and one side bolted to the block, with the other
side bolted to the chassis mount. Final positions for the mounts were decided and they were tacked up in the engine
bay. Brendans work again.
Back to Lance's work to weld them up, then a bit of a clean and the most horrible job (IMHO) was done. The motor sat
pretty well.
Then, a suitable driveshaft was found to be cut down by Aiden from Drive Inn. The usual fast turn around and great deal ensured this part was painless. The set-up was starting to look good.
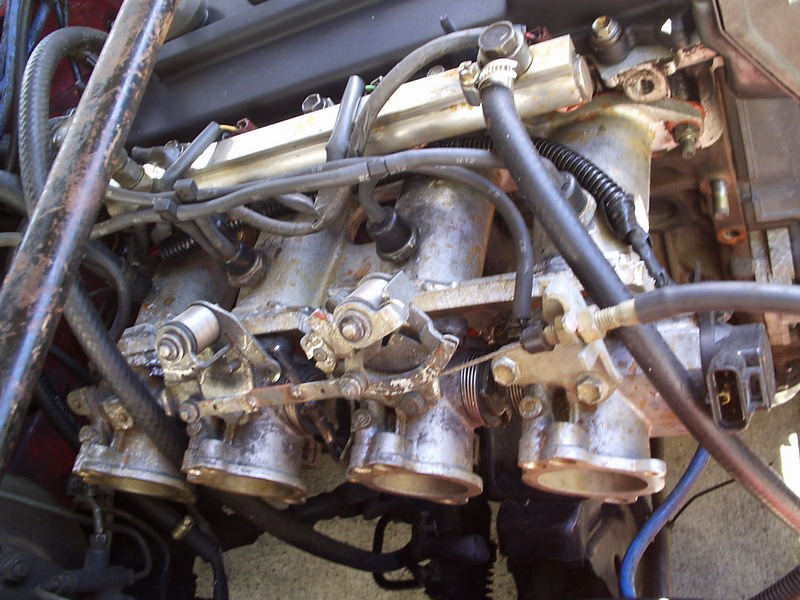
There was no way I was going to try and use the standard manifold, it was ugly, bulky, and for the hassle it seemed
better to just fit quad throttles from a 20V Silvertop 4AGE.
With the Weber carburretor manifold from Fraser Cars, I chopped the edge of the weber bolt flange off, and Stu
welded on the 20V flange supplied by Brendan. 1+2 and 3+4 ports could be roughly located together, with the center
gap bigger then normal.
Then, with Lances help, the 20V face and manifold face were drilled. Then the ITB's were lined up again and their
bolt holes marked, to be drilled and tapped.
Once done, with the quads bolted on, the linkages needed to be extended. Once again, Lance on the welder with some
steel tabs.
Lastly, we drilled and tapped the ports to run a brake booster, fuel pressure regulator, and MAP feed for
MegaSquirt.
With the manifold bolted on, with the quads, there's only just room for 70mm trumpets if the brake fluid splitter is
moved.
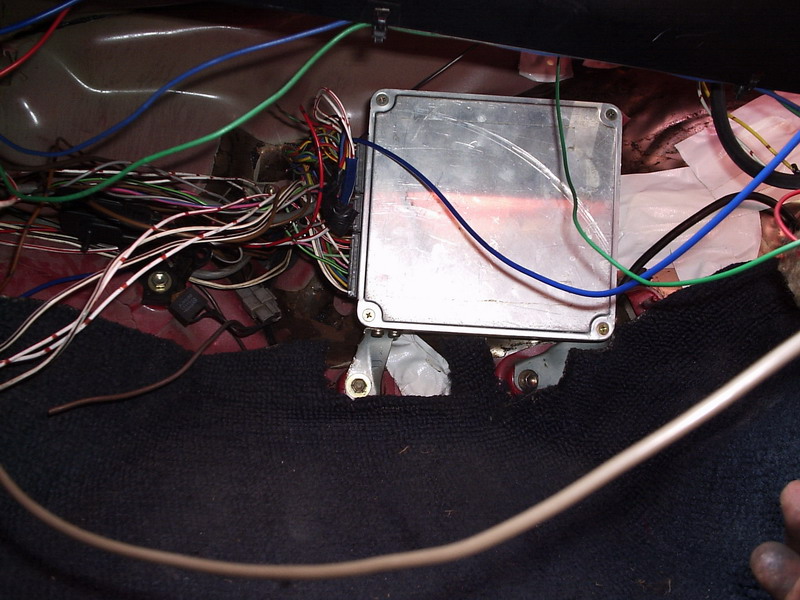
The standard ecu was retained for spark only, with the water and air temp sensors faked with resistors. The map
sensor is plugged in but is open all the time, injectors not in use of course. Spark is currently set around 20-25
base with max advance about 35, but under load only 25deg. I can't get any more advance on it due to the bolts in
the distributor housing. In hindsight, The standard ECU may have required the knock sensor to be plugged in for it
to run more timing at higher rpms.
Initially, 2 cyls were used for map for MS, and 2 for the fpr. However, it bumps around a lot like that, so I've
added a standard Toyota dampener in and now all 4 are used for the MS. Idle is about 69-70KPA.
Hindsight again, the manifold wasn't completely flush with the head and was leaking a little on #4. With the
manifold cleaned up, idle dropped to 50kpa, which is comparable with 4age ITB's and other ITB installs.
It's running really well and I'm getting about 150kms for 17ltrs. Plenty of room for improvement.
The MS is loaded up with the EXTRA code now, which contains 12x12 tables, and all sorts of other goodies which I'm
unlikely to use. It's heavily biased between 100 and 90, in 2KPA increments.
I'm using a 4AGE oil pressure sender, but as it's in the back of the head instead of the block its reading is pretty
different to a 4age. about 1/3 instead of 2/3, and it drops away when it gets hot.
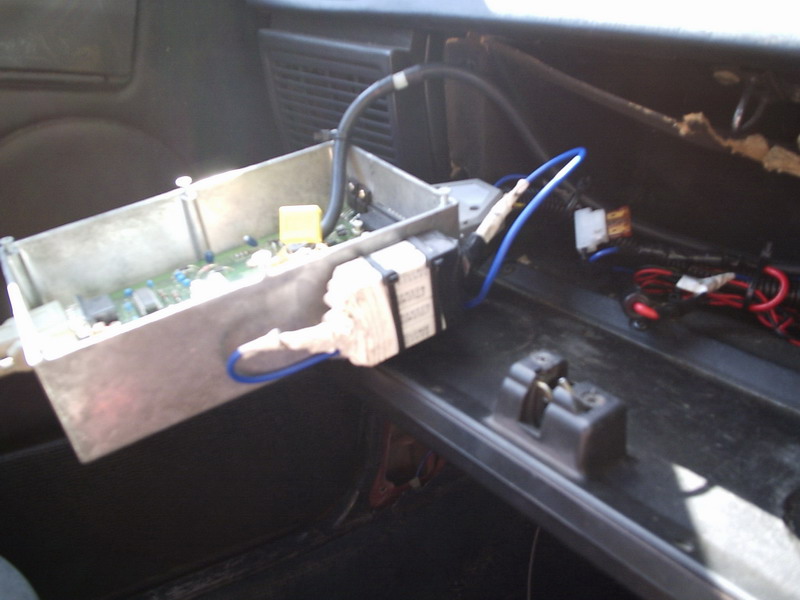
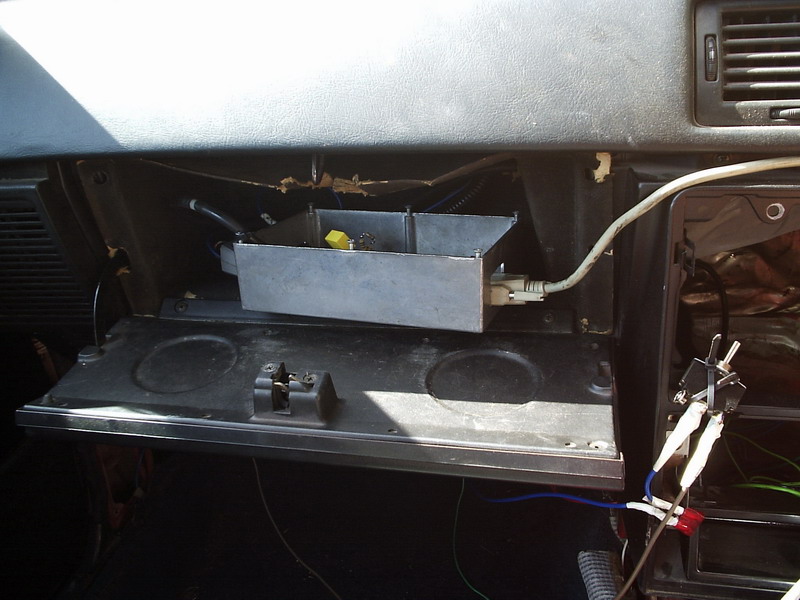
Man the wiring is messy here, I should have really tidied it up. And the nonstandard megasquirt case is not pretty.
Oh well.

Lance made up some 4->1 extractors out of 45mm pipe, and it joins up with the rest of the 2.5" exhaust (from turbo
days).
Theres water running around the block for the thermostat bypass and oil cooling, however all this has been removed
and it just runs no thermostat.
The first motor ran a bearing on the track: Because, on the way to the track, as the oil filter bolt was shortened,
but it wasn't square, so the oil filter seal crapped out at high revs and dropped all the oil. After fixing this and
putting some oil in it, the motor was slow and quickly ran a bearing.
So, another motor was sourced from Dan this time, and it's in great condition... 109kW at the wheels on the Torque
Performance dyno.
It's a bit like having a turbo for the first time.... I only drove the last one around the track for one lap, as I
was tuning whilst Brendan drove it on the way down. So it had been a few months with no driving. However, I started
using it daily for a month and put 2000kms on this setup.
As usual, hit me up on the forum if you've got any questions.
Old Megasquirt Config - 3SGE-Gen2-ITB MSnS-EXTRA 020i
However, I recommend using the following Fuel Table (VEX format) and using the latest MSnS-Extra code.
3SGE
Gen2 ITB Fuel Table